Looking to enhance your flexibility through yoga? In this article, you’ll discover the 15 most effective yoga poses for improving flexibility!
Flexibility offers numerous health benefits, such as alleviating aches and pains, enhancing balance, and preventing injuries. Stretching your muscles can also help reduce tension and stress, which can lead to various issues, including weight gain.
The yoga poses for flexibility are categorized into three groups: Hamstrings, Hips, and Back. They are arranged by difficulty, starting with the easiest stretches. Choose an area to focus on and begin with the first pose!
It’s crucial to warm up your body properly before diving into deeper stretches, as this will help you increase your flexibility more quickly. Avoid jumping straight into a 30-second stretch on a tight muscle; instead, ease into it with lighter stretches first.
Aim to hold each pose for at least 30 seconds, and remember that some poses may need to be repeated on the opposite side. If you’re eager to elevate your flexibility, work towards holding each pose for at least one minute.
Consider designating specific days of the week to target different muscle groups. Trying to work on all three muscle groups daily can be overwhelming and may prevent you from giving each one the attention it deserves. Aim to practice the yoga poses for flexibility for each muscle group at least twice a week for faster results!
Note: This article previously featured 16 poses but has been updated to include 15! This post may contain affiliate links, which help keep this content free. Please read our disclosure for more information.
Many of these yoga poses for flexibility involve “bends,” which are highly effective for increasing hamstring flexibility. If you find yourself getting bored with repetitive practice, consider catching up on your favorite TV show to make the stretches more enjoyable and less tedious!
Starting with a pose that opens up the legs, shoulders, and chest is beneficial before moving on to deeper stretches. The key to this pose is maintaining a straight back. Practicing in front of a mirror can help you notice if your lower back is bending.
As you practice and improve your leg, ankle, and hamstring flexibility, you’ll see your back flatten over time. Press your palms into the mat and bring your head closer to your knees to deepen the stretch in your shoulders and chest.
You can also “pedal” your feet in this pose by lifting one foot onto the toes while keeping the other flat on the ground. Hold for 30 seconds.
This pose is essential for flexibility. Depending on your natural flexibility, you may or may not be able to touch your feet. Don’t worry if you can’t! With consistent practice of these hamstring stretches 2-3 times a week, you’ll be pleasantly surprised by your progress!
Reach as far as you can or use a yoga strap until you can touch your toes. Keep your back straight and flat to enhance the stretch in your hamstrings, avoiding any hunching. Hold for 30 seconds and repeat on the other side.
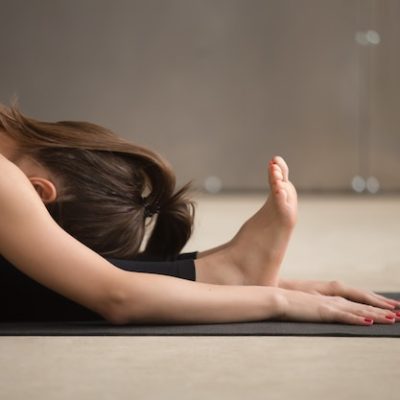
This pose is similar to the previous one but involves both feet in front of you. You can also try it from a standing position after practicing the standing half forward bend (further down the list).
Again, focus on keeping your back straight while leaning forward. Leaning forward at the hips is more effective than at the waist, which can lead to hunching and a lighter stretch.
Spread your legs as wide as possible while keeping them straight. Place your hands on the ground in front of you and lean forward at your hips, not your waist. Hunching your back will limit your stretch, so maintain a straight back for better results.
This pose can be more effective with assistance; if someone can apply gentle pressure on your back, it can enhance the stretch. Hold for 30 seconds.
We can’t stress enough the importance of keeping your back straight while stretching in this pose. The best way to learn this is to practice in front of a mirror.
Start by standing tall, then slowly lower yourself while arching your back and pushing your butt up towards the ceiling. Stop and hold the stretch when your lower back begins to bend. Many may find it challenging to reach their knees at this point, but with practice, you’ll improve!
This is another crucial pose for flexibility. Focus on proper form to enhance your flexibility and progress more quickly. Hold for 30 seconds.
This is the last forward bend, we promise! These poses are the most effective for increasing hamstring flexibility. Notice how the back remains arched and not hunched.
Begin with your arms extended in front of you, then lower towards the floor without bending your back. Hold for 30 seconds.
Surprisingly, hip flexibility is essential for many yoga poses you might not expect. It’s a vital part of the yoga poses for flexibility. For example, backbends require flexibility not only in the back, shoulders, and chest but also in the hips.
These stretches are especially important if you spend most of your day sitting, which tightens hip muscles. Practice these 2-3 times a week when possible.
Bring the bottoms of your feet together in front of you and clasp them with your hands. Keep your back straight and bend forward at the hips, not the waist. Your knees may not touch the ground initially, but the goal is to eventually have them resting on the floor.
Spend some time leaning forward and pressing your knees gently into the ground as you bend forward. Hold for 30 seconds.
You may have done a lunge in an exercise program before, but it’s different in yoga. Here, the focus is on opening the hips rather than working the glutes.
Keep the front leg at a 90-degree angle, but feel free to move a bit in this stretch to target different areas of the hips. You can lean forward slightly or raise your arms straight above your head and even lean back a bit to stretch your back.
Traditionally, the top of your back foot should be flat on the floor, but you can try this variation as well. This stretch is crucial for achieving the splits, as it targets the inner hip muscles.
Hold for 30 seconds and remember to repeat on the other side.
This pose stretches the outer hip muscles and has two variations. First, try it as shown, with the left leg at a 90-degree angle (beginners may need to keep it closer to the body) and the right leg straight behind you.
Press up through your hands to keep your shoulders back and stretch your lower back as well (you can also use a table or wall for support). You’ll likely feel this in the front of your right hip too.
For the second variation, maintain the same leg position but bring your chest down towards the floor (or as close as you can, possibly leaning on your forearms). This will shift the stretch from your back to the outer left hip.
Try holding both variations for 30 seconds each before switching to the other side.
Ah, the yogi squat! While its purpose differs slightly, it’s a versatile pose. Your legs should be about four feet apart with toes pointed outward. Your hands can be together at your heart, extended to the sides, or resting on your hips.
This pose is excellent for opening the hips. Press your tailbone forward, imagining your butt aligning with your knees. While it may be a few inches behind, this visualization helps stretch the hips.
You can also incorporate small “pulses” up and down to engage the glute muscles. Aim to get your legs as close to a 90-degree angle as possible, with thighs parallel to the ground.
Hold for 30 seconds and/or pulse for an additional 30 seconds for an extra workout.
The following yoga poses for flexibility can be beneficial if you experience chronic back pain. However, if you have any back issues, please consult a doctor before attempting these poses.
The spine is delicate, and any damage can be serious. The poses are listed in order of difficulty, so take breaks as needed before progressing.
This pose can be “easy” if not approached correctly. Challenge yourself to feel the stretch for maximum benefit. The goal is not to straighten your arms, as this can harm your back if done improperly. Your legs, hips, and lower ribs should remain on the ground.
Place your arms in front of you with bent elbows, and slowly rise using your shoulders and upper back. Press down with your hands, but focus on lifting with your chest and upper back instead of relying solely on your hands. You’ll feel this stretch in your lower back.
This pose is excellent for warming up the back before more intense stretches.
This pose is another key one for flexibility and is similar to cobra pose (above) but with a couple of key differences. In this pose, your arms are fully extended, and your hips and knees should not touch the ground.
This allows for a deeper stretch in the back while keeping the legs lifted to protect against injury. Only the palms of your hands and the tops of your feet should touch the floor.
Lift your gaze upward and hold for 30 seconds or as long as you feel comfortable.
This pose may feel a bit awkward if you’re trying it for the first time. You might look a little like a squashed bug until you gain enough flexibility to lift higher.
Grab the outside of your ankles with your hands and lift your chest while simultaneously raising your legs into the air. It may take some adjusting to find a comfortable position.
If you feel too much pressure or pain in your knees, take a break and try again. Hold this pose for 5-6 breaths unless you feel comfortable holding it longer.
This is my personal favorite for warming up my back when working on backbends. Before attempting this, place your hands on your hips, lift your gaze, and lean back slightly.
If you’re comfortable, lean back a bit more and shift your weight to one side to grab one heel (for me, it’s always my right) with one hand. Then arch your back, lean back further, tilt your gaze upward, and reach back to grab the other heel.
Let your neck relax and avoid straining to keep it upright, as this could lead to injury. Start by holding this pose for 5-6 breaths until you feel comfortable holding it longer. You can also try lifting one arm straight back at a time to increase the stretch on one side of your back.
In the full form of king cobra pose, your feet are meant to touch the top of your head, which requires significant flexibility.
We included this pose in the yoga poses for flexibility because it’s still a fantastic stretch, whether you can touch your head or, like me, you’re far from it.
Start in cobra pose (above) and lift your toes towards your head while arching your back and leaning backward.
Be mindful of your knees, as they tend to want to stick outwards; try to keep them close to hip-width. This pose may require some adjustments, and you should only hold it as long as you feel comfortable.
Always listen to your body when working on flexibility, especially regarding your spine. Pushing too hard can lead to injury and hinder your progress. However, apply enough pressure to stretch the muscles.
When you feel the stretch ease off, try to reach a little further. And remember to rest when needed!
If you enjoyed the 15 poses for flexibility and are ready to say goodbye to feeling stiff and tight, check out our Yoga Fat Loss Bible for Beginners!
Starting can be overwhelming and frustrating, making it challenging to stay motivated and on track. When I began, I tried to tackle everything at once, leading to minimal improvement across the board instead of significant progress in my goals.
That’s why I created a Flexibility Guide as part of my Yoga Fat Loss Bible for Beginners. The Yoga Bible features 50 fat-burning yoga poses with pictures and detailed instructions, covering the most common areas of yoga: strength, balance, flexibility, and meditation.
The Flexibility Guide focuses solely on increasing flexibility, based on my own practice and what has worked best for me over the past several months. It includes the most effective stretches and yoga poses for every muscle group you want to target, along with beginner modifications and helpful tips I’ve discovered along the way.
Good luck on your journey, and feel free to leave any comments or questions below! I’d love to hear from you!


