Interested in trying yoga? These 17 beginner yoga poses are the perfect way to start! You might not be able to do every pose on this list, as some are designed to challenge you. This is intentional. For your body to change, you need to change. You must become stronger, healthier, and more flexible to see results. However, most poses can be easily modified, and everyone should be able to perform some version of each pose. 🙂
Some yoga poses are called “two-sided” poses, meaning they should be repeated on both sides to ensure even stretching and strengthening of the muscles. Instructions will indicate when to “repeat on both sides.” We’ll begin with a few essential stretches and then move on to poses that focus on balance, strength, and flexibility. This post may contain affiliate links, which help keep this content free. Please read our disclosure for more information.
This stretch is excellent for tight hamstrings! Most of us aren’t born with extreme leg flexibility (myself included). This pose will help improve your hamstring flexibility. When bending over, try to arch your back slightly and bend at the hips, not the waist. Focus on pushing through your heels to enhance the stretch. At first, you might not be able to touch your toes. Just reach as far as you can and hold the position for 30 seconds. If the stretch eases, lean a bit further. Aim to repeat this at least three times a week for the best results, and remember to do it on the other side.
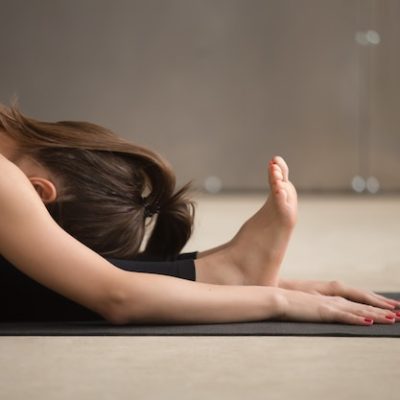
The second pose on our list is also crucial for hamstring flexibility. This pose is similar to the first, but it stretches both legs’ hamstrings simultaneously. Again, arch your back slightly and bend at the hips, not the waist, while pushing through your heels. You may not touch your toes initially, but with practice, you’ll be able to touch your forehead to your knees over time. You can also practice this while standing. Hold for at least 30 seconds.
This pose helps open your hips, which is especially important if you spend most of your day sitting at a computer, as it can tighten your hips. Sit with your knees bent and the soles of your feet together. Place your hands on your toes and gently lean forward. Bend at the hips, keeping your back as straight as possible. Your back should be “active” rather than hunched. Focus on keeping your knees close to the ground. Hold for 30 seconds.
The fourth pose on our list is essential for everyone to know. Many people don’t realize that your back should be straight when doing this pose. Try it in front of a mirror to check if your lower back is rounded or flat. This requires flexibility in both the legs and back. Ensure your hands and feet are shoulder-width and hip-width apart. Ground your heels and bring them as close to the mat as possible, which requires ankle flexibility. You can also deepen the stretch in your shoulders by leaning your head and chest toward the ground. Hold for 30 seconds, and then try the one-legged downward-facing dog (below).
This pose is a fantastic stretch for your hamstrings, hips, and shoulders. From downward-facing dog, slowly lift one leg as high as you can while keeping your back straight. Practice in front of a large mirror. To deepen the stretch in your hips and obliques, bend the lifted knee and tilt it back behind you to enter three-legged downward-facing dog.
This pose is similar to cobra pose but with some key differences. It stretches the lower back more intensely, so your hips and legs must be lifted off the ground to protect your spine. Only the palms of your hands and the tops of your feet should touch the ground. Keep your arms straight, with your hands directly below your shoulders and just in front of your hips. Keep your shoulders back and gaze slightly upward. Start by holding for 5-6 breaths, then work your way up to 30 seconds to 1 minute.
The plank pose is also a core pose for beginners. It’s essential for building strength in your abdomen and shoulders. Keep your hands shoulder-width apart and gaze down. The butt tends to “sink” in this pose, so ensure it stays lifted. Your shoulders and back should be slightly rounded. While this is the seventh pose on our list, it’s one of the most important to master! Hold for 30 seconds to 2 minutes.
If you’re unsure where to start with your yoga practice, our Yoga Fat Loss Bible for Beginners can guide you in the right direction! Check it out at the bottom of the page! 🙂
Chaturanga is the yogi push-up! This move builds significant muscle in your arms and is essential if you want to progress in your practice and work toward more advanced poses. Start in the same alignment as plank pose, then lower yourself until your chest is a few inches from the ground, keeping your upper arms parallel to your chest. Tighten your abdomen and hold this position for 10 seconds, working up to 30 seconds. You can also do it as a push-up combined with plank pose.
This pose effectively works your core and shoulders. Sit with your legs extended in front of you and your hands flat on the ground beside you. Point your toes and use your core and glutes to lift your hips toward the ceiling. The butt tends to “sink” in this pose, so try to keep your hips and butt lifted. Ensure your hands are turned inward toward your feet, not back behind you. If you feel discomfort in your wrists, ease up and rest in child’s pose.
Boat pose is excellent for your abs! In full boat pose, the legs are fully extended toward the ceiling, but we’ve included a variation for beginners. Start from a seated position, keeping your arms on the floor beside your hips for stability as you enter the pose. Arch your back slightly to keep it straight, bend your knees, and lift them so your calves are parallel to the ground. Let your hands hover on either side of your knees for balance, keeping your core engaged throughout.
This is another basic pose for your abs and back, similar to what you might do in circuit workouts. Use your core to lift your legs and shoulders as high as you can. Keep your gaze forward and relaxed, avoiding strain on your neck. Hold for 5-6 breaths, then release. Work up to holding it for 30 seconds and repeat three times. You should feel this pose mainly in your quadriceps and back.
From mountain pose, raise your arms overhead toward the ceiling (palms can touch or be shoulder-width apart). Arch your back and slowly squat down with your legs together. Your torso and the tops of your thighs should form a 90-degree angle or close to it. Tuck your tailbone in to keep your spine elongated. You can lift your gaze or look straight ahead. In traditional Warrior III, your head should tilt down with your ears next to your arms and your gaze down. This pose can be challenging for balance, so try it with your head lifted first. Stand with your feet shoulder-width apart. As you slowly lift one leg, raise your arms simultaneously to help with balance. The key is to keep your body as straight and parallel to the ground as possible, including your torso and the raised leg. Practice in front of a mirror for guidance. Remember to repeat on both sides.
The fourteenth pose on our list is a bit more challenging, but it’s worth trying. Plow pose counteracts backbends like cobra, upward-facing dog, and wheel pose. Use your hands to support and lift your lower back off the ground. Gently lower your feet toward the ground behind you; they may or may not touch. This requires hamstring flexibility, so let them hover wherever feels comfortable. Your hands can rest on the ground behind your back or continue supporting your lower back. Hold this pose for 5-6 breaths after any backbend.
This is a beginner variation of full triangle pose, where one hand points straight up toward the ceiling while the other touches the floor. Triangle pose requires flexibility in the legs, hips, and chest. This beginner modification is a good way to work toward full triangle pose. Keep your back straight, with the left foot pointed forward and the other foot pointed in the direction you’re leaning. Start at the knee and work your way down your leg toward the ground. Don’t forget to repeat on the other side.
From triangle pose, bend your right knee and shift your weight to the right. Place your hand on the floor for support, either in front of or behind your right foot. Ensure the left foot points forward in the same direction as your torso. Keep the outstretched arm aligned with the left leg, allowing energy to flow through your outstretched hand. You should feel this stretch in your obliques. Hold for 5-6 breaths and repeat on the other side.
The final pose in our beginner yoga series also targets the glutes. Similar to upward plank, keep your hips and butt lifted as high as possible. While your feet and arms support you, focus on lifting your torso using your core rather than your feet. This keeps your core engaged and works your abs and glutes effectively. You can also lift and lower your butt in this pose for an extra workout!
If you enjoyed these beginner poses and feel unsure about starting a regular yoga practice, check out the Yoga Fat Loss Bible for Beginners! It’s a fantastic resource for those looking to lose weight, gain flexibility, and relieve aches and pains through a calming yoga practice. It includes a flexibility guide and a free meditation guide for beginners. It offers detailed instructions and beginner modifications for your practice, along with a 6-Week Workout Plan suitable for any beginner!
Remember, don’t get discouraged if you’re not mastering these beginner yoga poses right away! Be encouraged that you’re making progress toward becoming the healthiest and happiest version of yourself! Leave a comment below if you enjoyed this article or have any questions!


